Thứ Sáu, 30 tháng 9, 2011

Flower arrangement tutorial: SIMPLE FLOWER + TEAPOT CENTERPIECE

 Flower arrangement tutorial: SIMPLE FLOWER + TEAPOT CENTERPIECE
With only a few simple supplies and some affordable blooms you can create a sweet teapot centerpiece that will look like it took you loads more time and effort that it really did.
You will need:
  • A teapot of any variety (lid not needed) | You can often find affordable used pots at thrift stores, if you don't already have one on hand.
  • Flowers with full blooms | I used two bunches of daffodils from our local grocery store for this project. These flowers are great because they are in season right now and super affordable (under $3 a bunch)...but you can really use anything from roses and tulips to lilacs or lilies in your centerpiece in their place. You could even make yours with greenery or flowers that you've scavenged from the outdoors. Pick a favorite bloom and run with it.
  • Pruning shears or scissors | Shears will obviously work best and may be necessary depending on the type of flower you use, but scissors can be used if you prefer (just be aware that thick stems may damage your scissors).
  • Floral frog (optional) | You can find cheap floral frogs at your local craft store (mine was only about $2). For this project they are very helpful but not entirely necessary. In place of a floral frog you could also use marbles, pebbles, etc.
How to:
  • Carefully set your floral frog inside your teapot and fill pot 1/2 way with cold water.
  • Snip the ends of your flowers one at a time and insert them inside teapot, securing with floral frog. I'm sure there is a correct way to do this, but I'm not a floral designer so I just started by adding my tallest blooms to the center and then began to fill around and under those with shorter blooms. I think the beauty of a bouquet like this is that it the fullness of the flowers really helps you out and hides any patches that you might have missed.
  • Place your handmade centerpiece on your table or tie a tag on the handle and give as a gift to an unsuspecting friend (don't forget to include the lid)! Enjoy! xo Ez

Free Crochet Patterns: Colored Pencils for kids


Free Crochet Patterns: Colored Pencils for kids
Here is a quick and easy pattern for a cute little amigurumi pencil. Enjoy!

Materials:
- crochet hook size E/4 - 3.5 mm
- worsted weight acrylic yarn in pink, light grey, hot pink, red, orange, yellow, green, turquoise, blue, purple and beige
- black embroidery floss or black yarn split down to 2 ply
- stuffing
- needle
- 6mm black safety eyes

With pink yarn
Rnd 1: 6 sc into an adjustable ring and pull the ring closed(6).
Rnd 2: 2 sc in each sc around (12).
Rnd 3: [sc in next sc, 2sc in next sc] 6 times (18).
Rnd 4: working in back loops only, sc in each sc around (18).
Rnds 5-7: sc in each sc around (18).
Switch to light grey yarn
Rnd 8: sc in each sc around (18).
Rnd 9: working in back loops only, sc in each sc around (18).
Switch to hot pink, red, orange, yellow, green, turquoise, blue or purple yarn
Rnd 10: working in back loops only, sc in each sc around (18).
Rnds 11-18: sc in each sc around (18).
Pause crocheting to attach safety eyes and stitch on mouth using black yarn.
Switch to beige yarn
Rnd 19: sc in each sc around (18).
Rnd 20: [sc in next sc, s2ctog] 6 times (12). Stuff pencil and continue to stuff as you work from now on.
Rnd 21: sc in each sc around (12).
Rnd 22: [sc in next 2 sc, sc2tog] 3 times(9).
Switch to hot pink, red, orange, yellow, green, turquoise, blue or purple yarn
Rnd 23: [sc in next sc, sc2tog] 3 times (6).
Rnd 24: [sc2tog] 3 times (3).
Finish off leaving a 6" tail. Weave tail through remaining 6 sc and pull up firmly to close the hole. Weave in ends.

Thứ Năm, 29 tháng 9, 2011

Paper crafts for wedding: FREE TEMPLATE Wedding Card!

  Paper crafts for wedding: FREE TEMPLATE Wedding Card!I made this card for the Late Night Stampers "Bring on the Bling" Challenge! It's hard to see how shiny this is but the dazzling diamonds really sparkle!
As long as I was doing it I figured I would make the template to share with you guys! This is huge for me because that means I had to actually think about what I was doing first instead of just cutting as I go!

CLICK HERE to get the FREE TEMPLATE!

Here are the steps:
I printed out the template and cut the dress out of Bride Specialty Designer Series Paper. I centered the dress shape on the texture in the paper so it would be symmetrical. I cut out the extra pieces of the dress and put them on with a dimensional only at the bottom. I then used a two way glue pen to trace some of the swirls in the paper and add some dazzling diamonds.


I used a piece of 1/4" white grosgrain ribbon with a rhinestone brad in the center for the waist.


For the tux, I cut the outside and tie out of black paper. For the tux shirt I used the other pattern of Bride Specialty Designer Series Paper with the stripes. I used the mini rhinestone brads for buttons.


The card is 4 1/4" x 5 1/4" so the dress and tux shirt can stick up and still fit in the envelope. I had it open in the middle instead of on the side and I put the dress over the opening to hide it. Both the dress and tux I put on with dimensionals.

Unique toys for kids: Pipe Cleaner Animals tutorial


Elephant, Frog, and Bird Pipe Cleaner Animals
Supplies: Pipe Cleaners, Crazy Eyes, glue

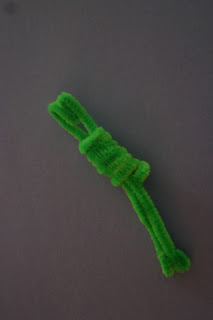
Frog: First coil a green pipe cleaner loosely around a pencil. Fold another one in half and then bend back the two ends.

Fold back both sides to make a sort of heart shape at the top. These will be the eyes.


Stick this second pipe cleaner through the coil. Stick the feet out of the bottom coil.


Pull down the second pipe cleaner until the eyes barely stick out of the top of the coil. Then fold up each leg.


Beware of cats. Apparently pipe cleaners are like cat nip to them.


Bend down the legs. Glue on little eyes. Add a tongue. (You could also add front arms, but I chose not to)


The Bird: Coil a red pipe cleaner around a pencil.


Cut an orange pipe cleaner in half (about 6 inches). Then fold that in half. Stick the orange pipe cleaner into the coil. Stick the top through the top two coils.


Bend forward the beak. Fold over and bend forward the feet. It was a little difficult for me to get it to balance. Cut a red pipe cleaner in half and stick it straight through the coil.


Fold over the wings. Glue on eyes.


You could stop here but I decided to add a little flair.


The Elephant: This one ended out being a little harder to make. First coil a blue or gray pipe cleaner around a marker. Stick out a little tail.

Cut a pipe cleaner into thirds. attach one to each side. Attach the third to the front as a trunk.


Cut another pipe cleaner into halves. Stick them through the bottom of the coil.


Fold down all four of the legs. Fold up each of the feet. I had to make the back ones a little shorter than the front ones to get it to balance. Glue on the eyes. You could also add little tusks with white or gray pipe cleaners.


Elephant pipe cleaner animal, frog pipe cleaner animal, bird pipe cleaner animal
Unique  toys for kids:  Pipe Cleaner Animals tutorial

Bunny for Easter: PomPom Bunny DIY

This cute easter project is really easy to make and sooooo fun! I’ll show you how:


You will need white yarn, a small and a big PomPom maker, glue, white and pink felt, scissors and plastic eyes (or buttons)
First, start making PomPoms.
A small and a big one. :) Leave a long tail!
Put the smaller PomPom on the bigger one and tie them together
I made simple knots!
Then, cut off the left yarn.
Cut 2 ears from white felt.
And smaller inner ears from pink felt.
Glue the pink inner ears to the white ears.
Then, glue the ears to the bunny’s head.
You might want to use your fingers to make the ears stick.
It’s almost finished xD
Now, take some plastic eyes in an appropriate size.
And glue them to the head.
For the nose, cut a tiny little heart from pink felt.
Glue it to the cutie’s face!
And now, your bunny is finished!
Related Posts Plugin for WordPress, Blogger...